My cousin made these Mua Chee for sale but I couldn't get her recipe. Recently I came across a recipe for this kind of Mua Chee in Yum Yum food magazine which looks good and easy to make. In good mood, I roasted the peanuts [see post on how to roast peanuts] cos' I believe it tasted better than store bought ground peanuts. I prepared the ingredients in batches [not the same day]. The filling a day earlier and the dough the next day. It's easy. We get to enjoy the mua chee that can be made plain or with pandan flavour. There is another with cocoa flavour which I made. Recipe Source - Yum Yum Magazine No. 86 with modificationsVerdict - soft, chewy mua chee with lots of peanut filling. Bite and chew it slowly, you will detect the chocolate flavour. You can make 1/2 portion, should be able to make about 18-20 pieces [depending on the size you prefer]. Ingredients
[makes about 36 pieces]
Peanut Filling [mixed well] - 1/2 portion should be enough
500 gm peanuts - toasted, skin removed and grounded
50 gm white sesame seeds - toasted and grounded
120 gm castor sugar
Cocoa Glutinous Rice Dough
350 gm glutinous rice flour
50 gm tapioca flour
2 tbsp cocoa powder
2 tbsp sugar
2 tbsp oil
500 ml water
For coating
200 gm rice flour - stir fry over low heat for about 20 minutes or until very light. Remove to cool.
- Mix all the dough ingredients in a steaming bowl. Steam over high heat for 20 minutes. Remove and transfer the dough into a greased plastic bag while still hot.
- Knead the dough until smooth and elastic.
- Divide the dough into small portions [about 30 gm] and put them into the prepared rice flour.
- Flatten the dough and wrap in peanut filling. Gather the edges to seal into a ball. The ball should be well coated with the rice flour.
- Place onto paper cases to serve.
The original recipe [pau skin and filling] is from Agnes Chan which was published in Yum Yum Magazine which I intend to follow but dropped the pau skin recipe as I noticed that the shortening used was quite a lot and the double action baking powder was not included but shown in the method. As I was a bit doubtful about it, I retrieve my notes on other pau recipes which I had listed done to try.I found this recipe of Cheah's [No Frills Recipes] having the same quantity as Agnes's recipe. Must say that it is worth trying cos' these paus stay soft and fluffy even when cooled. Thanks Soke Hah for sharing this lovely pau skin recipe but I did some adjustments to the ingredients and method [proofing step]. |
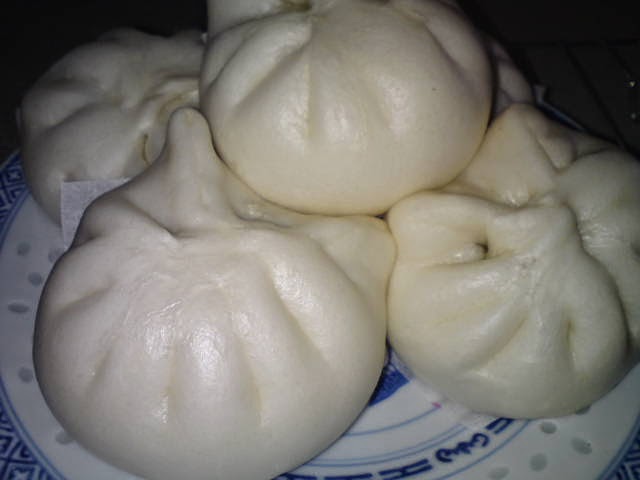
Home-made paus can be eaten without peeling off the skin
I modified the method slightly [the proofing step] and the paus turned out well. So now I have a choice of two workable/good pau dough recipes in hand depending on the quantity I wish to make. Either this recipe here [500 gm flour] or my Sure Can Pau Skin Recipe [350 gm flour]. Of course, Agnes's recipe below also yields soft and fluffy paus but the skin is a bit yellowish in colour. |
 |
| Paus with different pleats |
 |
| See my niece enjoying the steaming hot pau for breakfast |
Ingredients for Pau Skin - starter dough method Recipe Source - No Frills Recipes[makes 20 paus]2 1/2 tsp instant yeast120 ml lukewarm water [original uses 100 ml]130 gm pau flour - sifted- Mix ingredients together into a soft and rough dough. Cover and leave to rest for 15 minutes.
370 gm pau flour - sifted100 gm caster sugar [original uses 125 gm]120-130 ml water [original uses 100-115 ml] 2 tsp double action baking powder [original uses 2 1/8 tsp]5 tsp shorteningUsing a Dough Mixer or Hand Knead - Combine all the ingredients [except shortening] with the yeast dough in a mixing bowl. Knead until well combined [about 5-10 minutes]. Then add in the shortening, continue to knead until soft, smooth and elastic. I find the dough texture is quite similar to that of my tortoise buns [Mi Koo].
- Shape into a ball and cover to rest for about 30 minutes [original is for 1-1 1/2 hours] or until double in size.
- Punch down dough and remove dough to a floured surface.
- Divide into 20 equal portions [about 45-50 gm] and roll into balls.
- Flatten each ball, then roll into flat circle.
- Wrap filling with each flatten dough. Gather the edges and shape into pleated paus or round balls. Place on parchment or greased proof paper in the steaming tray.
- Leave to prove for 45 minutes from the time you finished shaping the last pau or until double in size.
- Steam over high heat for 10-12 minutes in a steamer. Off heat and leave paus for a further 2-3 minutes before uncovering and remove to cool on wire rack.
Wrapping and pleating the pau
This is a lovely pau filling and also a tasty dish to serve with porridge. Moreover, it is also very easy to prepare. The original recipe uses garlic but I replace it with shallots [more aromatic]. This can be prepared a day earlier if using as pau filling. 
 |
| Sweet Mui Choy and Pork Belly Pau Filling |
Recipe Source - Yum Yum Magazine with slight modifications
Ingredients
[enough as filling for 20 - 24 paus]
300 gm skinless pork belly - cut into thin strips
300 gm sweet mui choy - rinsed, soaked and cut thin shreds
1 tbsp chopped garlic [I used shallots]
1 tbsp dark soy sauce
1 tbsp sugar
200 ml water
2 tbsp oil
1 tsp cornstarch + 1 tbsp water
some chopped spring onions and toasted sesame seeds [optional]
- Pan fry sweet mui choy without oil in a wok for several minutes until soft and dry. Dish out.
- Heat up wok, add in streaky pork belly to fry until almost dry and fat oozes out. Add in oil [less if there is much oil from the meat]. Saute chopped shallots until golden brown [much healthier way as you can omit the oil].
- Add in the fried sweet mui choy, dark soy sauce and sugar. Stir to mix all the ingredients well [use a scissor to snip at the mui choy if the shreds clamp together - when using it as pau filling].
- Add in water, let it boil and simmer until soft and almost dry.
Stir in the thickening to cook. Dish out to cool before using. [I added some spring onions and sesame seeds to enhance the flavour].
Ingredients for Making Paus - Recipe from Agnes Chan's book [see post] [makes 20 paus]500 gm pau flour - sifted
100 gm caster sugar
240 ml water
1/2 tbsp instant yeast
1.5 tbsp shortening [original uses 3 tbsp]
1 tbsp double action baking powder [I included here after checking]
- Using a Dough Mixer or Hand KneadCombine all the ingredients [except shortening and baking powder] in a mixing bowl. Knead until soft [about 5-10 minutes]. Then add in the shortening, continue to knead until soft, smooth and elastic.
- Shape into a ball and cover to rest for about 15-20 minutes or until double in size. Add in baking powder, knead well to distribute the baking powder until the dough is smooth again. Cover and rest for 15 minutes before shaping. [Note: double action baking powder is added at this stage cos' it is believed to prevent yellowish looking paus]
- Punch down dough and remove dough to a floured surface, divide into 3 round balls. Then divide each ball into 8 equal portions. Shape each into a ball, then roll into flat circle.
- Wrap filling with each flatten dough. Gather the edges and shape into pleated paus or round balls. Place on parchment or greased proof paper in the steaming tray.
- Leave to prove for 15 - 20 minutes or until double in size. Spray paus with some water before steaming.
- Steam over high heat for 10-12 minutes in a steamer. Off heat and leave paus for a further 3 minutes before uncovering. Remove paus to cool on wire rack or serve immediately.
Notes: Visit this site for its' Nutritional Facts [here]


 I'm submitting this post to Cook Your Books Event #16 hosted by Joyce of Kitchen Flavours